What’s actually slowing this PC down?
Pick the symptom - the matching free tool is one click away.
Inferse is reader-supported. When you buy through links on our site, we may earn an affiliate commission. As an Amazon Associate I earn from qualifying purchases. Learn more
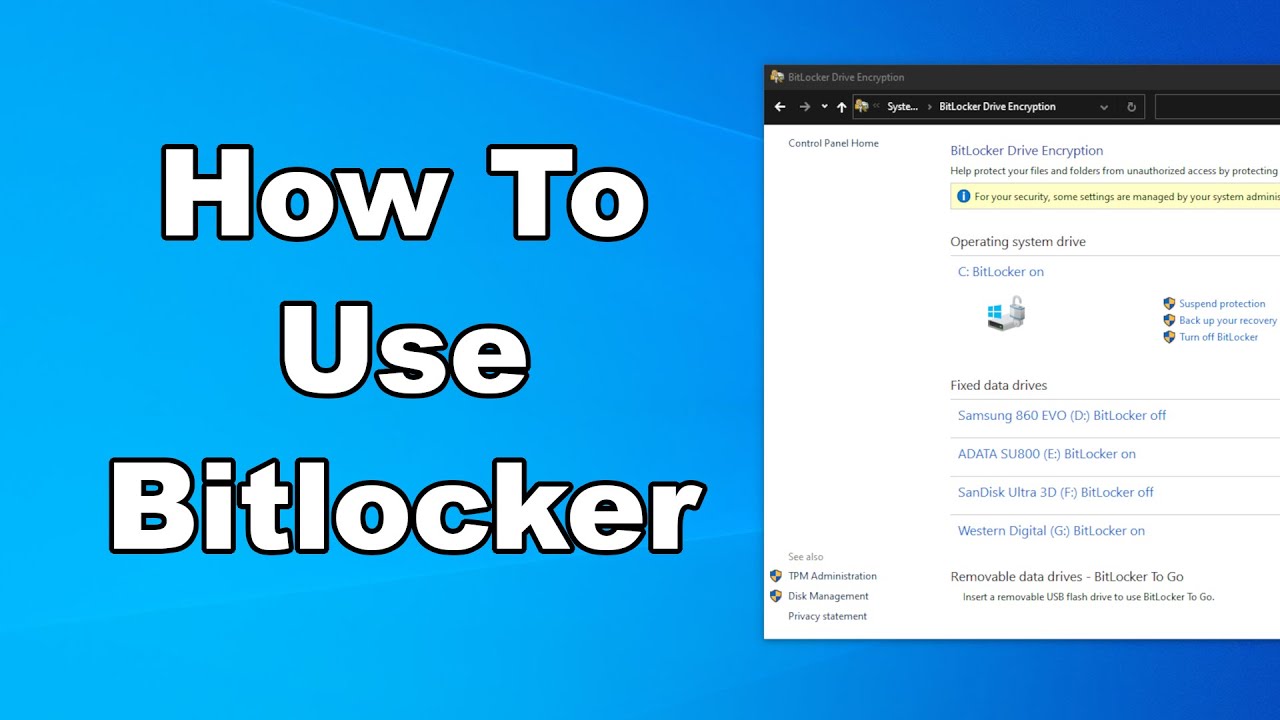
Creating an encrypted drive using BitLocker in Windows adds a significant layer of security to your data. This means that if your computer is lost, stolen, or its hard drive is removed and placed in another system, the data on the BitLocker-encrypted drive will be unreadable without the correct password or recovery key.
Prerequisites for Using BitLocker
Before you start, ensure your Windows system meets the necessary requirements:
- Windows Edition: BitLocker Drive Encryption is available in:
- Windows 11 Pro, Enterprise, and Education.
- Windows 10 Pro, Enterprise, and Education.
- BitLocker is generally not available in Windows Home editions. For Windows Home, you might see “Device encryption” for the main OS drive, but not full BitLocker for other drives.
- Administrator Privileges: You must be logged into Windows with an administrator account to enable BitLocker.
- Trusted Platform Module (TPM) (Recommended but Optional for Non-OS Drives):
- For the operating system drive (C: drive), BitLocker often leverages a TPM chip (version 1.2 or higher) for enhanced security. A TPM is a secure cryptoprocessor that stores encryption keys.
- For data drives (non-OS drives, like D: or external drives), a TPM is not strictly required. You can use a password or USB flash drive to unlock the drive.
- Target Drive: The internal or external drive you wish to encrypt. Ensure it has enough free space for the encryption process (typically minimal, but good practice to have some).
Step 1: Open BitLocker Drive Encryption
There are a few ways to access the BitLocker settings.
Quick wins for a faster PC:
Scan for outdated or missing drivers - takes under a minuteDriver Scan →Clear out junk files and repair common Windows errorsFree Scan →- Through File Explorer (Recommended):
- Open File Explorer (press Windows Key + E).
- In the left-hand pane, click on “This PC.”
- In the main window, you will see a list of your drives.
- Right-click on the drive (e.g., Local Disk (D:), New Volume (E:), or your external drive) that you want to encrypt.
- Select “Turn on BitLocker” from the context menu.
- Through Control Panel:
- Search for “Control Panel” in the Start Menu and open it.
- Change “View by” to “Large icons” or “Small icons.”
- Click “BitLocker Drive Encryption.”
- In the BitLocker window, find the drive you want to encrypt and click “Turn on BitLocker” next to it.
Step 2: Choose How to Unlock Your Drive
The BitLocker Setup Wizard will now guide you through the process. The first step is to choose your preferred unlock method.
Shopping ad

- Get NVMe solid state performance with up to 1050MB/s read and 1000MB/s write speeds in a portable, high-capacity drive(1) (Based on internal testing; performance may be lower depending on host device & other factors. 1MB=1,000,000 bytes.)
- Up to 3-meter drop protection and IP65 water and dust resistance mean this tough drive can take a beating(3) (Previously rated for 2-meter drop protection and IP55 rating. Now qualified for the higher, stated specs.)
- Use the handy carabiner loop to secure it to your belt loop or backpack for extra peace of mind.
- Help keep private content private with the included password protection featuring 256‐bit AES hardware encryption.(3)
- Easily manage files and automatically free up space with the SanDisk Memory Zone app.(5). Non-Operating Temperature -20°C to 85°C
- For Fixed Data Drives (Internal Non-OS Drives):
- “Use a password to unlock the drive”: This is the most common and recommended option for easy access. Enter a strong password (mix of uppercase, lowercase, numbers, and symbols) twice.
- “Use a smart card to unlock the drive”: For enterprise environments with smart card readers.
- For Removable Data Drives (External USB Drives):
- “Use a password to unlock the drive”: Most common for external drives.
- “Use a smart card to unlock the drive”: Less common for personal use.
- “Automatically unlock this drive on this computer”: (Only available for internal drives if BitLocker is also enabled on your OS drive and TPM is present). This allows the drive to be automatically unlocked when you log into your Windows account on that specific PC. Use with caution if security is paramount.
- For Operating System Drive (C: Drive): The options are more complex, often involving a TPM, a USB startup key, or a password at boot.
Select “Use a password to unlock the drive” for most common scenarios. Enter your chosen password twice and click “Next.”
Step 3: Save Your Recovery Key (Crucial Step!)
This is perhaps the most important step in the BitLocker setup. The recovery key is a unique, 48-digit numerical key that allows you to access your encrypted drive if you forget your password, if the drive is moved to another computer, or if there’s an issue with your TPM. Losing this key means losing access to your data permanently.
You will be given several options to save your recovery key:
Recommended Free Tools
Shopping ad

- Solid state performance with up to 800MB/s read speeds in a portable drive. (Based on internal testing; performance may be lower depending on host device, interface, usage conditions and other factors. 1MB=1,000,000 bytes.)
- Back up your content and memories on a storage solution that fits seamlessly into your mobile lifestyle.
- Take it with you on your adventures—up to two-meter drop protection means this durable drive can take a beating. (Based on internal testing.)
- Secure it to your belt loop or backpack for extra peace of mind thanks to the tough rubber hook.
- From Sandisk, a brand professional photographers trust to take on assignments.
- “Save to your Microsoft account” (Recommended for personal users): This option saves the recovery key to your linked Microsoft account, making it easily retrievable online via account.microsoft.com/devices/recoverykey. This is convenient but relies on your Microsoft account security.
- “Save to a file”: Saves the key as a text file (.TXT) to a chosen location. Save this file to a safe, separate location from the drive you are encrypting. For example, save it to a USB flash drive (different from the one you’re encrypting), another external hard drive, or a cloud storage service (securely).
- “Print the recovery key”: Prints the key to a physical piece of paper. Store this paper in a secure physical location (e.g., a safe, secure cabinet).
- “USB flash drive” (for OS drives only typically): Saves the key to a USB drive that you use to unlock the OS drive at boot.
Choose at least two methods to save your recovery key for redundancy. For instance, save it to your Microsoft account AND save it to a file on a separate USB drive. Click “Next.”
Step 4: Choose How Much of Your Drive to Encrypt
On the “Choose how much of your drive to encrypt” page:
- “Encrypt used disk space only” (Recommended for new drives or empty drives): This is faster, as it only encrypts the parts of the drive that currently contain data. Any new data written to the drive will be automatically encrypted.
- “Encrypt entire drive” (Recommended for drives with existing data): This encrypts all sectors on the drive, including free space. It’s slower but ensures no remnant unencrypted data exists. Choose this if the drive previously contained sensitive data that might not have been fully erased.
Select your preferred option and click “Next.”
Step 5: Choose Encryption Mode
On the “Choose which encryption mode to use” page:
Shopping ad

- Capacity Display Variance: 500GB external ssd often appears as around 465GB on Windows. MacOS can show full 500 GB capacity. This is binary calculation difference and doesn’t affect SSD hard drive actual physical storage
- 1050 MB/s Speed: Instantly access to your files with blazing-fast 10Gbps external SSD read up to 1050MB/s and write up to 1000MB/s. LED Light indicates USB SSD instant activity
- Data Security: Solid state drives S.M.A.R.T. health diagnostics and adaptive TRIM optimizing data block management ensures consistent write speeds and extends the longevity of the portable SSD
- USB-C & USB-A Cable: Both cables featuring rapid USB 3.2 Gen2, this USB SSD effortlessly bridges devices, enabling seamless cross-platform file transfers and backup between computers, smartphones, tablets and iPhone
- Always Fast: No slowdowns for large file transfers. With SLC caching (25% of current available capacity allocated as high-speed cache), this external SSD delivers steady 10Gbps for transfers within the cache capacity
- “New encryption mode (XTS-AES 128-bit)” (Recommended for fixed drives on current Windows versions): This is the default and most secure encryption mode for drives that will only be used on Windows 10/11.
- “Compatible mode (AES-CBC 128-bit)” (Recommended for removable drives or drives used on older Windows versions): Choose this if you plan to use the encrypted drive with older Windows versions (e.g., Windows 7, 8) or on devices that might not support the new encryption mode.
Select your preferred option and click “Next.”
Step 6: Start Encryption
You’ll see a final confirmation page.
- Click “Start encrypting.”
- The encryption process will begin. This can take a significant amount of time, depending on the size of the drive, the amount of data, the encryption mode chosen, and your computer’s speed. You can continue using your computer during encryption, but performance might be affected.
- Do not disconnect external drives during encryption.
- Once encryption is complete, the drive icon in File Explorer will show a padlock icon, indicating it’s BitLocker encrypted.
Step 7: Accessing Your Encrypted Drive
- Internal Drives: If you chose automatic unlock on your primary PC, the drive will unlock seamlessly when you log in. Otherwise, you’ll be prompted for the password when you access the drive.
- External Drives: Each time you connect the external BitLocker-encrypted drive to a Windows PC, you will be prompted to enter your password to unlock it.
- You can also right-click the drive in File Explorer and select “Unlock Drive.”
Managing BitLocker (After Setup)
To manage your BitLocker-encrypted drives:
- Go back to Control Panel > BitLocker Drive Encryption.
- Here, you can:
- Suspend protection: Temporarily decrypts the drive for updates or troubleshooting.
- Resume protection: Re-encrypts a suspended drive.
- Back up your recovery key: If you forgot to save it initially or want new copies.
- Change password.
- Remove password.
- Turn off BitLocker: Fully decrypts the drive and removes BitLocker protection.
By following these steps, you can effectively secure your data with BitLocker, providing peace of mind against unauthorized access.
Frequently Asked Questions (FAQ)
Q1: What is the main benefit of using BitLocker to encrypt a drive?
A1: The main benefit of BitLocker is data protection against unauthorized access. If your computer or an encrypted drive is lost or stolen, the data on it remains encrypted and unreadable to anyone without the correct password or recovery key. This prevents sensitive information from falling into the wrong hands.
Shopping ad

- Easily store and access 2TB to content on the go with the Seagate Portable Drive, a USB external hard drive
- Designed to work with Windows or Mac computers, this external hard drive makes backup a snap just drag and drop
- To get set up, connect the portable hard drive to a computer for automatic recognition no software required
- This USB drive provides plug and play simplicity with the included 18 inch USB 3.0 cable
- The available storage capacity may vary.
Q2: Can I use BitLocker on Windows 10 Home or Windows 11 Home Edition?
A2: Generally, no. BitLocker Drive Encryption is a feature primarily available in Pro, Enterprise, and Education editions of Windows. Windows Home editions usually only offer “Device encryption” for the main operating system drive on supported hardware, which is a more basic form of encryption, and doesn’t allow you to encrypt other data drives with BitLocker.
Free tools Windows power users keep installed
One-click scans. No signup required.
Q3: What happens if I forget my BitLocker password?
Shopping ad

- MADE FOR THE MAKERS: Create; Explore; Store; The T7 Portable SSD delivers fast speeds and durable features to back up any endeavor; Build your video editing empire, file your photographs or back up your blogs all in an instant
- SHARE IDEAS IN A FLASH: Don’t waste a second waiting and spend more time doing; The T7 is embedded with PCIe NVMe technology that brings fast read and write speeds up to 1,050/1,000 MB/s¹, making it almost twice as fast as the T5
- ALWAYS MAKE THE SAVE: Compact design with massive capacity; With capacities up to 4TB, save exactly what you need to your drive – from large working files to game data and everything in between
- ADAPTS TO EVERY NEED: Whether using a PC or mobile phone, count on the T7 for extensive compatibility²; It’s a true team player when it comes to heavy-duty application usage or file-saving
- HI RESOLUTION VIDEO RECORDING: Record Ultra High Resolution (4K 60fs) videos directly onto the T7 Portable SSD with your favorite camera or mobile devices; Supports iPhone 15 Pro Res 4K at 60fps video and more³
A3: If you forget your BitLocker password, your only way to access the encrypted data is by using your 48-digit recovery key. This is why saving the recovery key in a secure, separate location (e.g., to your Microsoft account, a USB drive, or printed copy) during the setup process is critically important. Without the password or the recovery key, the data on the drive will be permanently inaccessible.
Q4: How long does BitLocker encryption take?
A4: The time it takes to encrypt a drive with BitLocker depends on several factors:
- Drive size: Larger drives take longer.
- Amount of data: If you choose “Encrypt used disk space only” on a mostly empty drive, it will be much faster than “Encrypt entire drive” on a full drive.
- Drive speed: SSDs encrypt faster than HDDs.
- Computer specifications: Faster processors can complete the encryption more quickly. It can range from a few minutes for a small, mostly empty SSD to several hours or even a full day for a large, full HDD.
Q5: Can I move an encrypted BitLocker drive to another computer?
The Tool Desk
Outbyte PC Repair FREERepair Windows errors before they cause bigger problemsFix Now →Outbyte Driver Updater FREEScan for outdated or missing drivers - takes under a minuteDriver Scan →A5: Yes, you can move an encrypted BitLocker drive (especially a data drive) to another Windows PC. However, to access the data on that drive, you will be prompted to enter the BitLocker password or provide the recovery key. The other computer does not need to have BitLocker enabled on its own drives, but it must be running a Windows Pro, Enterprise, or Education edition to unlock a BitLocker drive (Windows Home editions cannot unlock BitLocker drives without special tools or the exact password, and even then, functionality might be limited).
Quick Recap
Product prices and availability are accurate as of the date/time indicated and are subject to change. Any price and availability information displayed on Amazon at the time of purchase will apply.